Claude Code + NotebookLM: 9 Use Cases I Run Weekly to Save Hours and Tokens
Connect NotebookLM to Claude Code via MCP in 15 minutes. Two install options, 9 weekly use cases, save hours and tokens without a Perplexity subscription.
NotebookLM has been my go-to research tool without hallucination.
If you’ve used it, you know: it searches the web, ingests PDFs and YouTube videos, and stores everything in a permanent, queryable notebook with citations.
If you’re new to it, it’s a free research tool by Google. Think of it as a knowledge base that only answers from sources you give it, or sources it finds from the web. It never makes things up from training data.
I’ve been using it for about a year. Appreciated the capabilities. But the biggest unlock came when you could finally connect it to Claude Code, which means your agent can query your notebooks mid-session, mid-build, 10x the power of Claude Code without extra bill.

What’s inside:
MCP setup in 15 minutes — two install paths with exact commands, works in Claude Code, Claude Desktop, and Cursor
10 use cases with prompts and real session outputs:
Do deep research from inside Claude
Query multiple notebooks in one session
Build an infographics pipeline
Build an app with Claude + NotebookLM
Index audio and video into your workflow
Content repurposing on autopilot
Find bug patterns across hundreds of log files
Automated daily research brief
Audio overviews for non-technical stakeholders
Team shared knowledge base
Loading...
Hi, I’m Jenny 👋
I build AI systems and tools, then share how I did it. I run the Practical AI Builder program — for people who already use AI and want to build real things with it. Check it out if that sounds like you.
If you’re new to Build to Launch, welcome! Here’s what you might enjoy:

What NotebookLM actually is: source-anchored research, not a note app
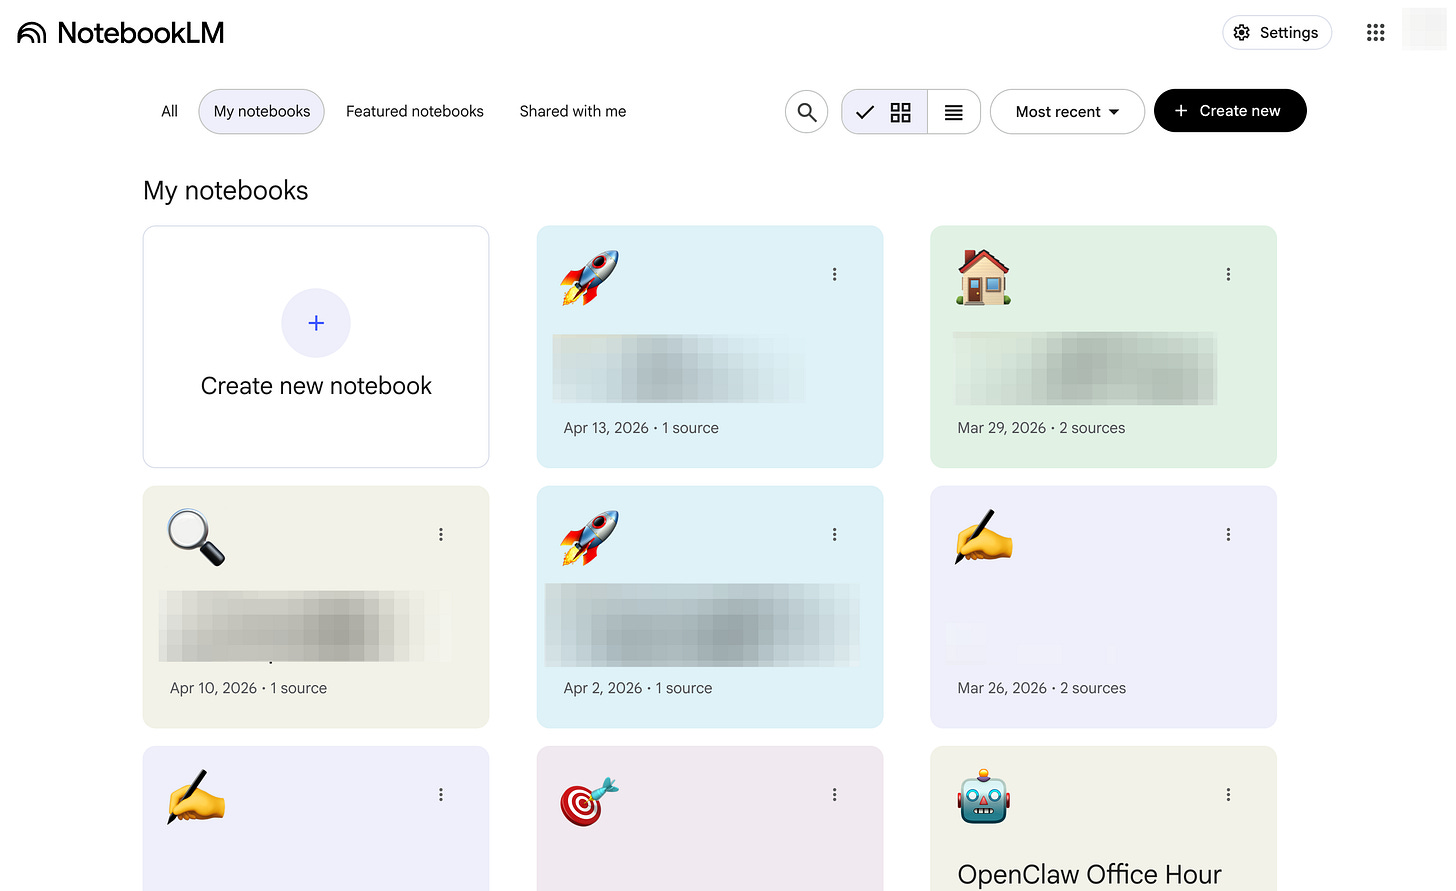
It looks like a note-taking app at first glance. That’s what most people close the tab on.
NotebookLM is a source-anchored knowledge engine. It only answers from sources you provide or sources it researches for you. It doesn’t pull from training data. Every answer comes with a citation pointing to the exact passage it drew from.
That’s a fundamentally different behavior from Claude, ChatGPT, or Perplexity, and it’s what makes the Claude Code integration worth setting up.
Three things NotebookLM transform how you do work:
Deep web research — a built-in feature that finds, evaluates, and imports sources on a topic. Real web retrieval from actual pages, not a language model estimating from training data.
Multi-source grounding — load up to 300 sources into a single notebook. Every chat answer shows numbered references you can click to see the exact source passage.
Artifact generation — from your sources, generate a podcast (Audio Overview), slide deck, study guide, FAQ, briefing doc, quiz, or infographic. From your sources, not from scratch.
Here’s how it compares to the tools you’re probably already using:
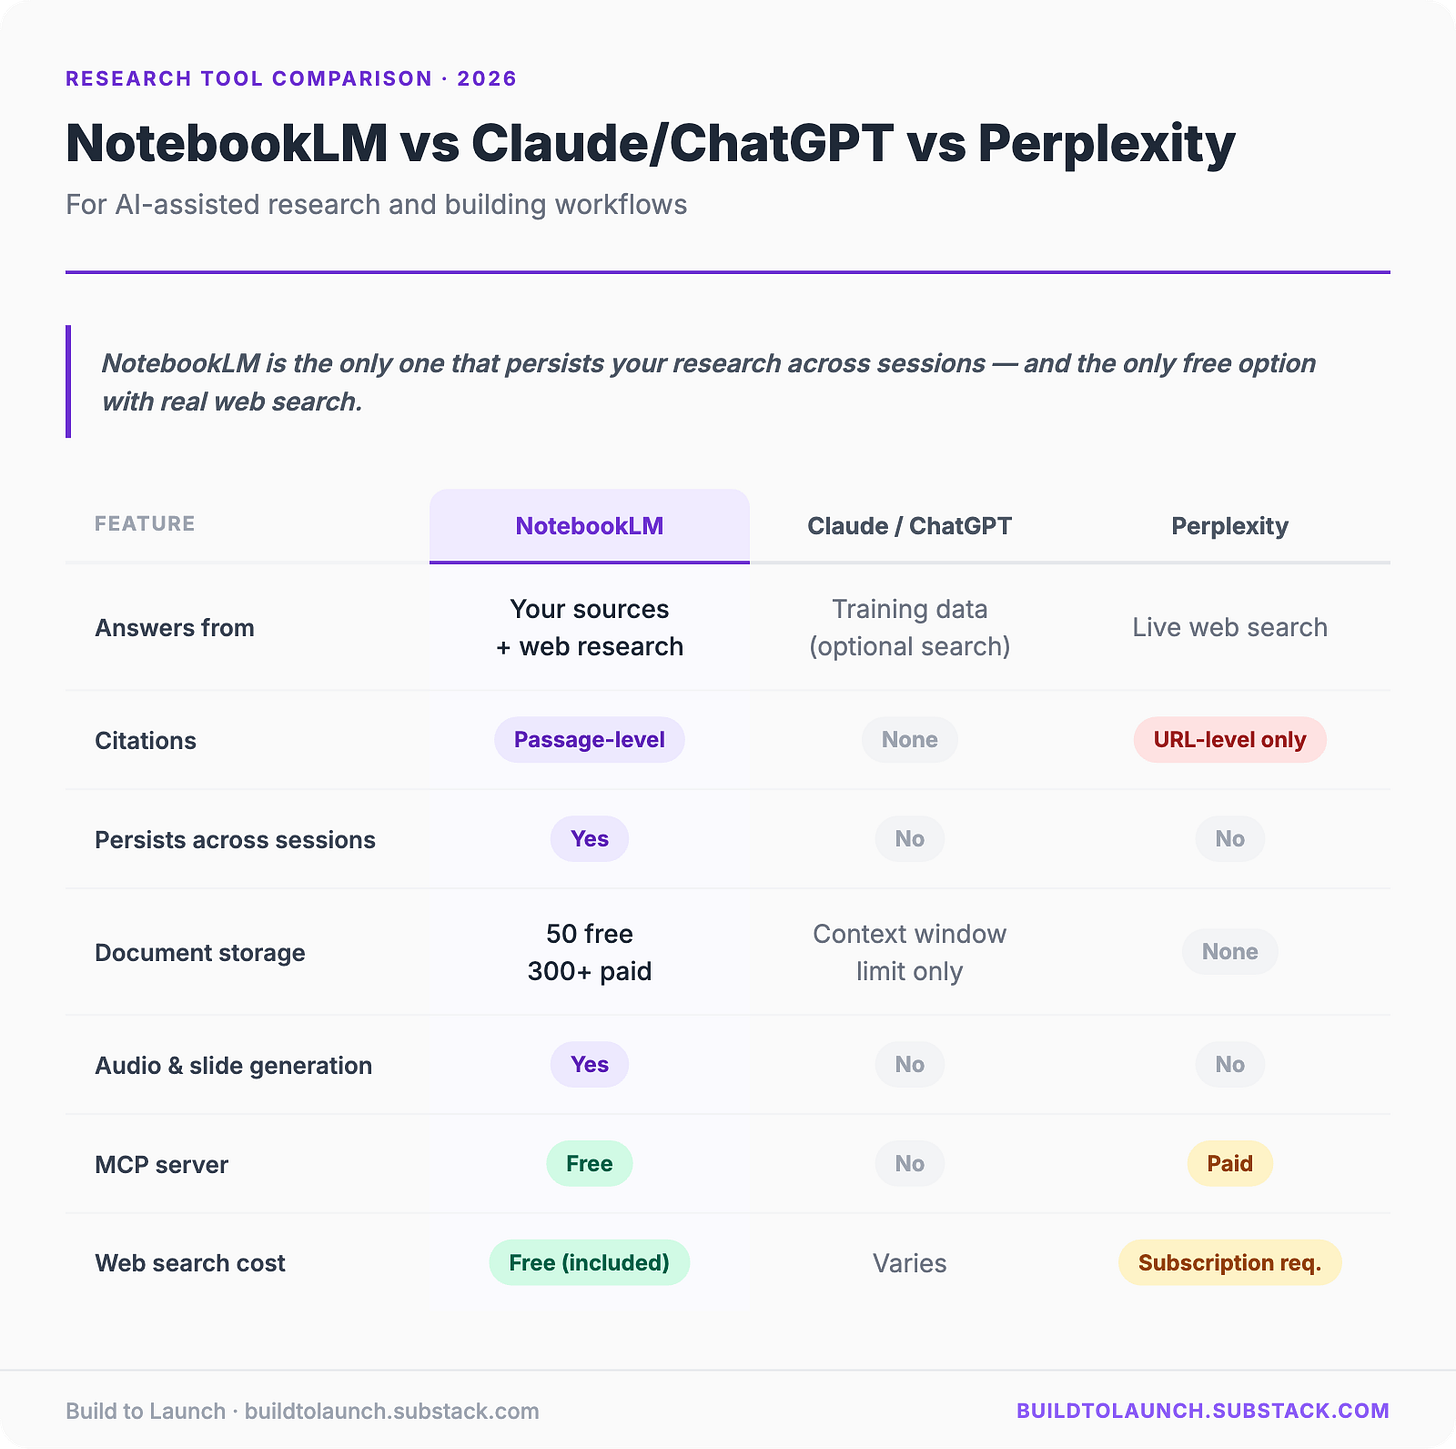
The honest framing: if your research fits in Claude’s context window and you don’t need citations, you probably don’t need NotebookLM.
It earns its place when you’re working across many documents over multiple sessions, or want web research without an API subscription.
How to use NotebookLM in the browser: sources, deep research, and artifacts
Before connecting anything to Claude Code, it’s worth knowing what the web UI can do on its own.
You’ll need: a Google account.
Go to notebooklm.google.com.
Create a notebook:
Click New notebook
Name it (e.g., “Research: [your topic]”)
The interface opens with two panels: sources on the left, chat on the right
Add sources:
NotebookLM accepts:
Website URLs
PDF files (upload from your machine)
YouTube video URLs (it transcribes and indexes the full video)
Google Docs or Google Drive files
Plain text (paste directly)
You can add up to 50 sources per free notebook.
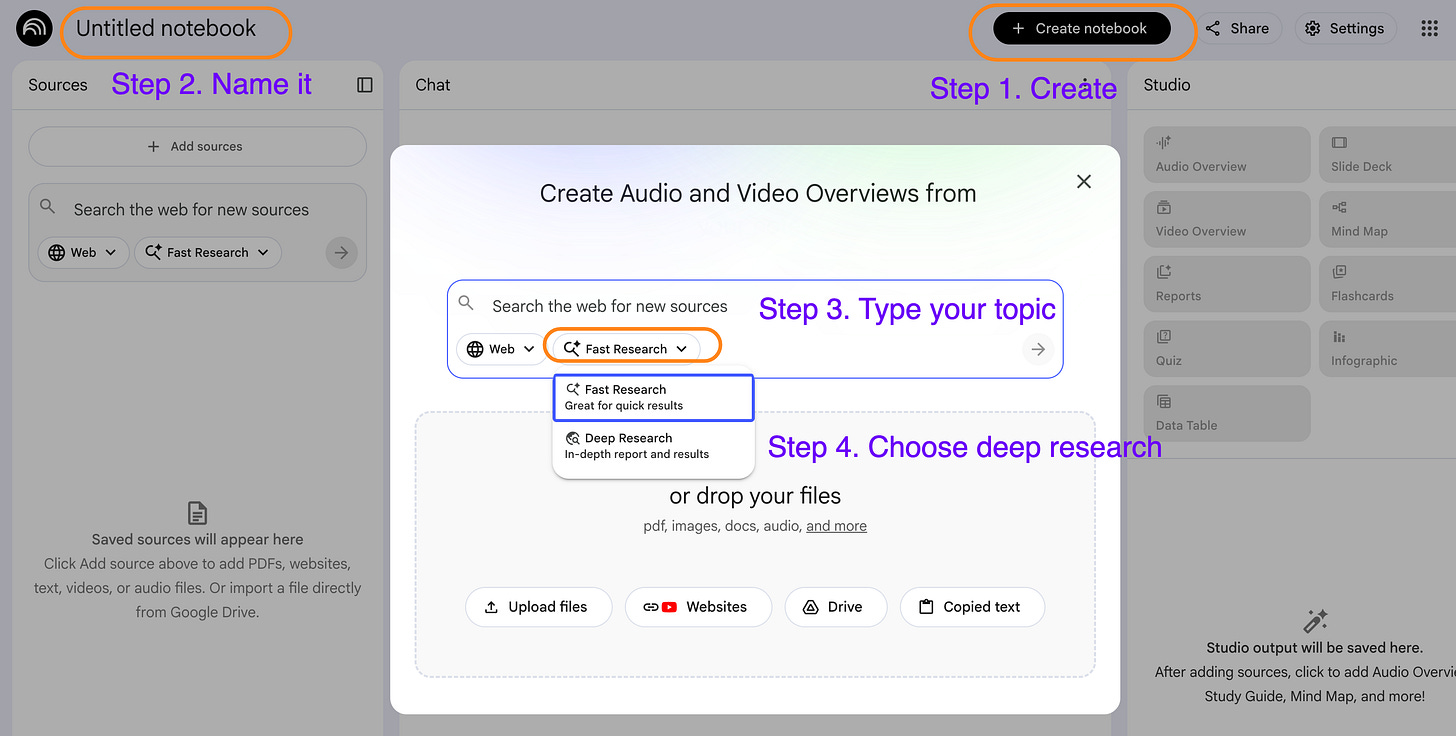
Run deep research:
In the sources panel, click Discover sources.
Type one focused research question. NotebookLM runs a web search, evaluates results, and imports up to 50 of the most relevant sources directly into your notebook.
I was learning about infographics patterns, my example prompt:
Search across high-quality sources (design blogs, academic papers, and data visualization guides) for principles of effective infographics and data visualization.
Focus specifically on extracting:
Core design principles
Visual hierarchy, layout, spacing, typography
Color usage and contrast
Balance, emphasis, and unity
Cognitive and perception principles
How people process visuals (attention, memory, cognitive load)
Gestalt principles, pattern recognition, information chunking
What makes visuals easy vs hard to understand
Data storytelling principles
How infographics convey narratives, not just data
Sequencing, flow, and guiding reader attention
When to use different chart types and formats
Practical rules and constraints
What to simplify vs what to keep
Common mistakes (misleading visuals, clutter, wrong chart types)
Trade-offs (accuracy vs aesthetics, density vs clarity)
Return results in this format:
Grouped principles (Design / Cognitive / Data / Storytelling)
Named frameworks or experts when possible
Concrete examples (good vs bad, with explanation)
Actionable rules I can apply immediately
Avoid generic advice. Prioritize specific, evidence-backed insights.
Chat with your sources:
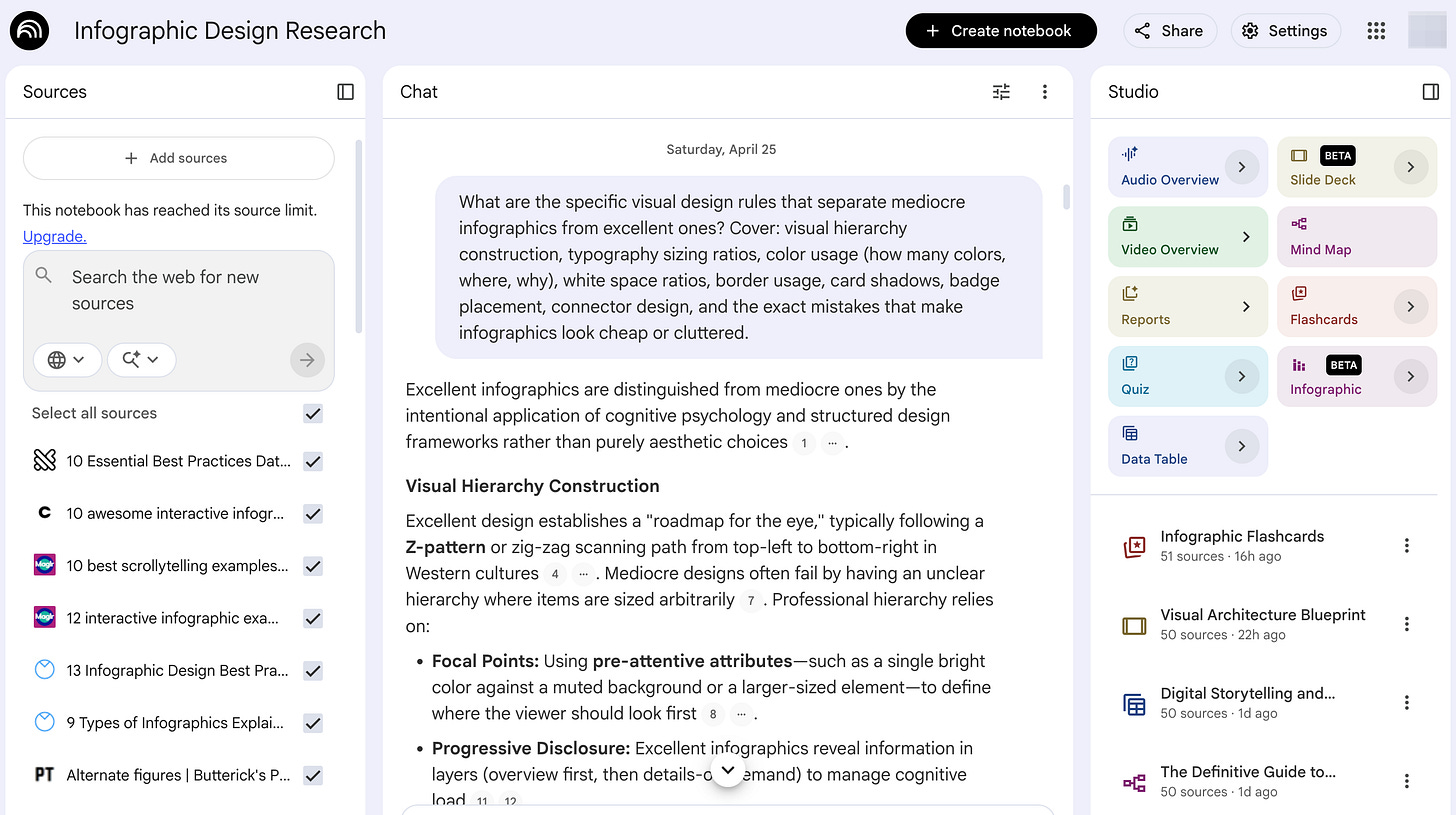
Ask questions in the chat panel. Every answer shows numbered references you can click to see the exact passage in the source.
My example prompt:
What are the specific visual design rules that separate mediocre infographics from excellent ones? Cover: visual hierarchy construction, typography sizing ratios, color usage (how many colors, where, why), white space ratios, border usage, card shadows, badge placement, connector design, and the exact mistakes that make infographics look cheap or cluttered.
The answer cited specific passages from dual coding theory papers and Tufte-derived material, not a language model summary.
Generate artifacts:
In the Studio panel in the top right. Each artifact type has a different output format:
Audio Overview — two AI hosts have a back-and-forth conversation about your sources. Downloads as an MP3. Useful for long research you want to absorb on a commute.
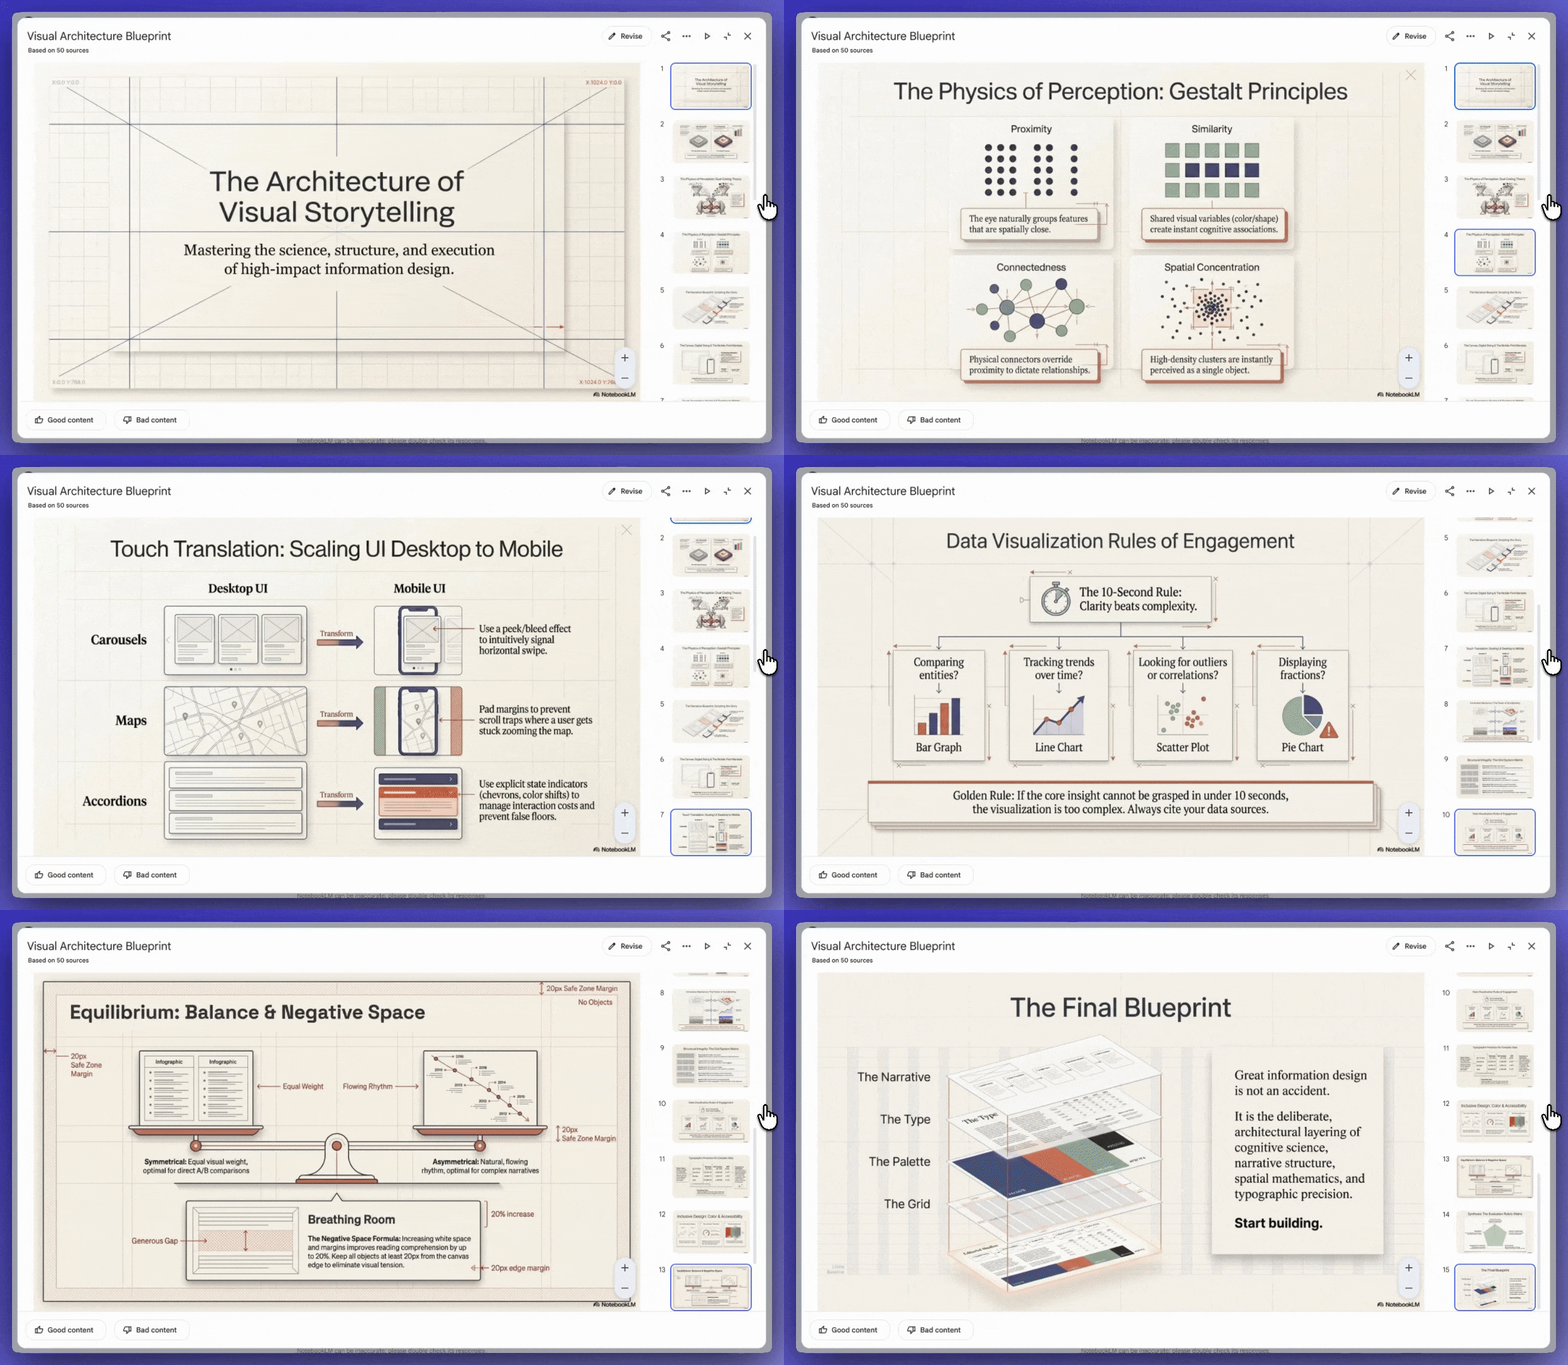
Slide Deck (beta) — auto-generated presentation from your notebook content. Structured slides, ready to edit.
Video Overview — a short animated video version of the Audio Overview. Same content, visual format.
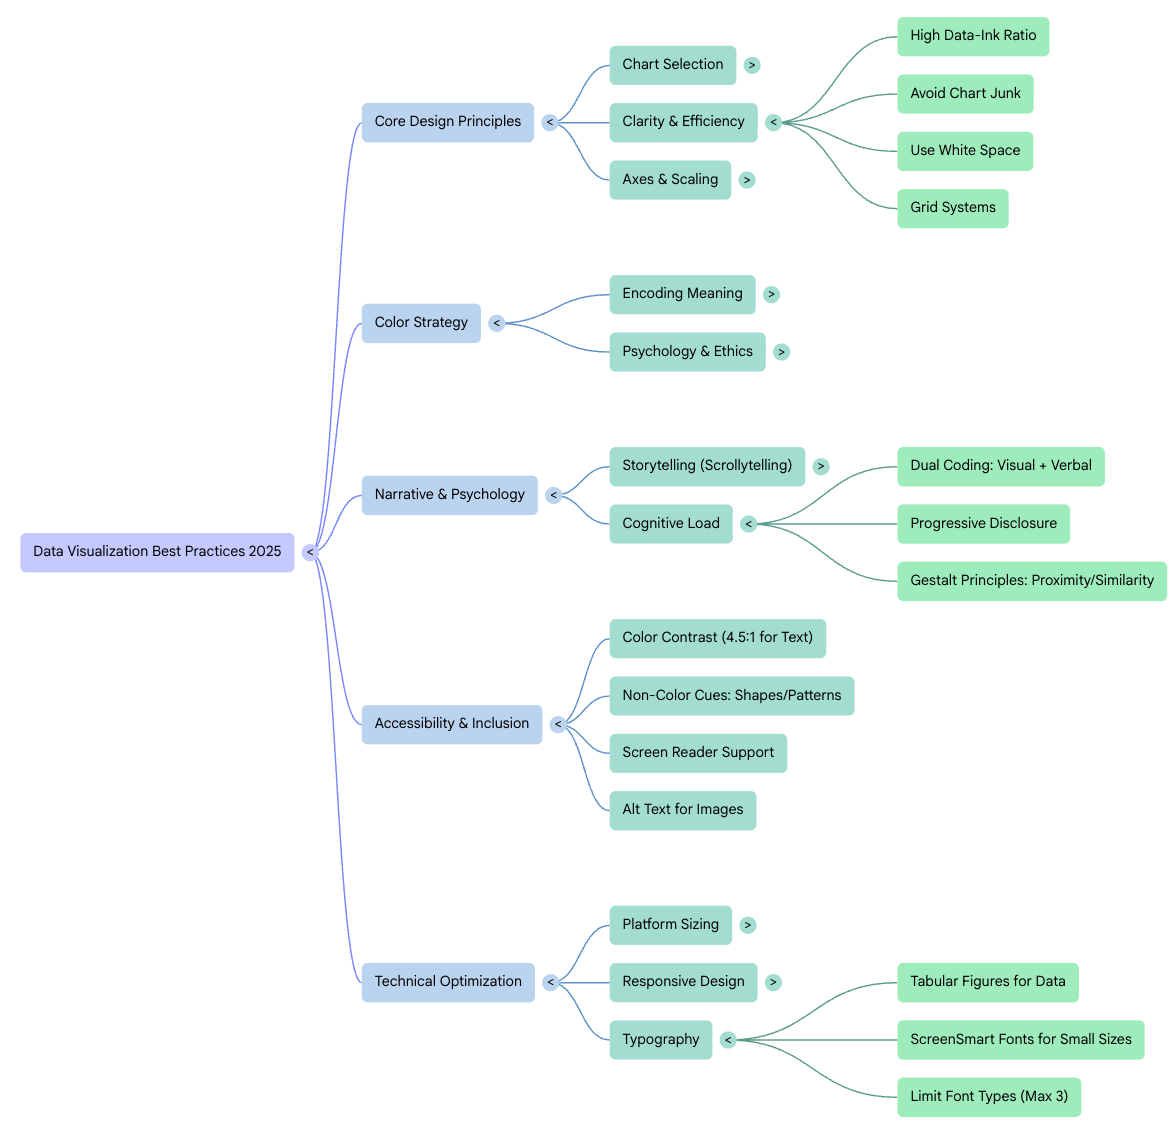
Mind Map — visual web showing how concepts in your sources connect to each other.
Reports — structured written report pulling key findings across all sources, with citations.
Flashcards — question-and-answer cards for memorizing key concepts from your sources.
Quiz — multiple choice questions generated from your source content. Useful for testing comprehension on anything you’re studying.
Infographic (beta) — a single-page visual summary of your notebook. Style presets only, no brand color control.
Data Table — extracts structured data from your sources into a table format.
Here are two of my favorite artifact types:
- The mind map that guides you through thinking structure
- The slide deck that helps you visualize the knowledge base
This is useful on its own. If you want to deep dive into a knowledge base, the web UI gets you there without any setup.
But if you already use Claude, combining the two pushes the capability much further with less cost.
Why connecting NotebookLM to Claude is different
Claude Code loads CLAUDE.md at session start — that’s its memory. Any external documents you bring in are gone when the conversation ends.
And there are more constraints beyond session resets.
Each session is scoped to one project, so cross-project research means starting over.
Every document you add eats into the context window, driving up token cost. For a single focused session, this is fine. For research you want to reuse across projects and sessions, it compounds fast.
NotebookLM persists. The sources stay indexed. You query them each time instead of re-uploading, and your context window stays clean for the actual work.
Three concrete reasons to connect them:
1. Free web search, no API cost.
NotebookLM’s deep research does real web retrieval. Results are grounded, cited, and stored permanently in the notebook.
No Perplexity subscription. No Apify API. No external tool at all.
If you don’t have a Perplexity MCP set up (most users don’t), this is available right now, at no cost.
2. Grounded answers instead of estimated ones.
When Claude Code researches a topic and builds from that research in the same session, hallucination risk goes up. The model is doing two hard things at once: synthesizing information and generating implementation.
Separating them changes the output.
NotebookLM handles the research. Claude Code reads the grounded brief and builds from what the sources actually say.
3. Queries mid-session without breaking flow.
With an MCP connection, Claude Code can call notebooklm_query mid-build, get a sourced answer back, and continue. No switching to a browser. No copying and pasting.
The setup takes 15 minutes. The section below covers two install options, all 9 use cases I use weekly, and the prompts that make each one work.
But what surprised me most wasn’t the web research. It was all the capabilities the two tools combined together, with less token cost and better grounded work.
Inside: two install paths (with exact terminal commands) and every workflow I run regularly, with prompts and real outputs from sessions I’ve run.
Connect NotebookLM to Claude in 15 minutes
Do deep research from inside Claude
Query multiple notebooks in one session
Build an infographics pipeline
Build an app with Claude + NotebookLM
Index audio and video into your workflow
Content repurposing on autopilot
Find bug patterns across hundreds of log files
Automated daily research brief
Audio overviews for non-technical stakeholders
Team shared knowledge base
This article continues for members
Join Build to Launch to read the full article, access all cohort content, and connect with other AI builders.